Managing Access Roles
Under the hood of Flexible (opens in a new tab), a role-based access control mechanism determines who can edit theming data for a given platformIndex that is linked to your platform during the one-click deploy process. By design, the person who creates a platformIndex is given admin rights to update themes automatically. Moreover, extra methods are provided for easy management of multiple administrators in a deployment. You can see the code for the PlatformThemeRegistry.sol contract here (opens in a new tab)
Access Roles
| Name | Value |
|---|---|
| 0 | NO ROLE |
| 1 | MANAGER = Able make changes to a platform's theme |
| 2 | ADMIN = Able make changes to a platforms's theme, and add and revoke admin roles |
How to Grant Roles
Quickstart
Visit Etherscan
- Go to the Etherscan (opens in a new tab) website and enter this contract address into the search bar. This will take you to the contract's page, where you can view its transactions, events, and other details.
0x9a23AE640040e4d34E9e00E500003000017144F4Prepare Transaction
- To write functions to the contract, you need to connect a Web3-enabled wallet, such as MetaMask, Rainbow, or Coinbase, to Etherscan.
- On the contract's page, click the "Write Contract" button, follwed by the "Connect to Web3" button. This will prompt you to connect your wallet.
- Follow the on-screen instructions to connect your wallet.
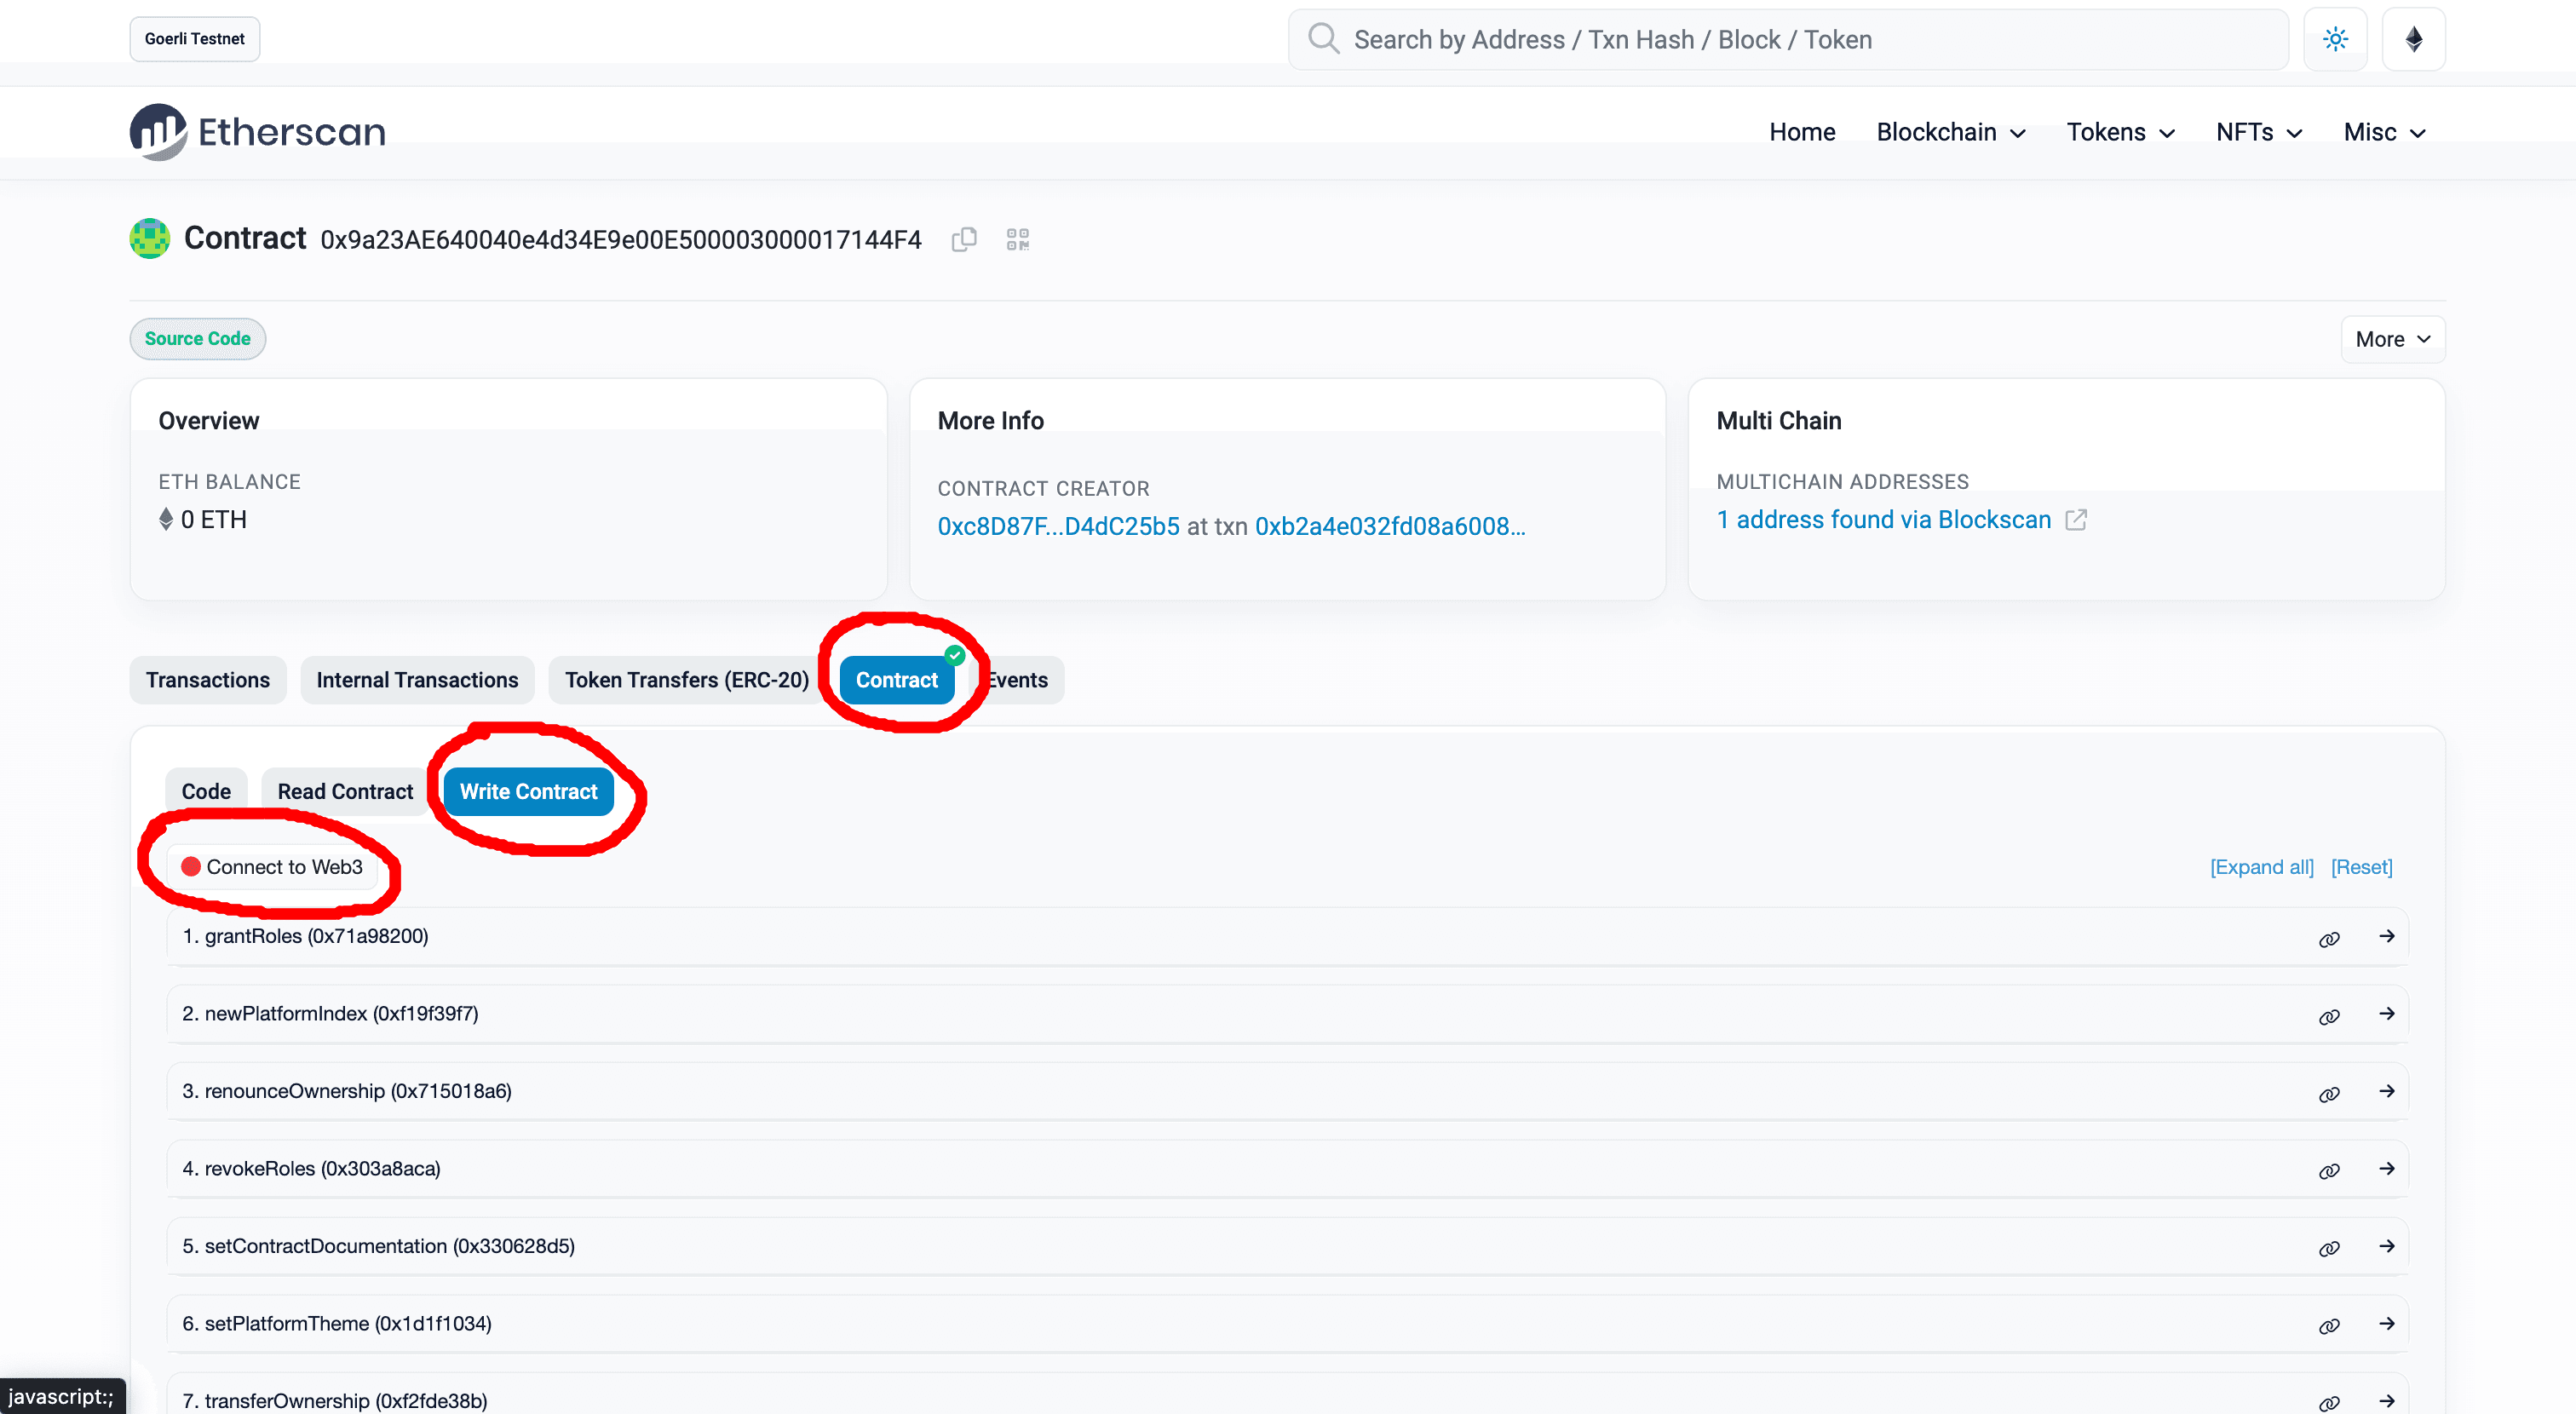
- Select the function you want to interact with from the list. You can open up the
grantRoles()function directly by clicking here (opens in a new tab)
Inputs for grantRoles()
-
Input your platform index. If you haven't minted it yet, check out our Getting Started page.
-
Provide the
roleDetailstuple using the following format:
[["0x0000000000000000000000000000000000000000", "1"]]-
Substitute the 0x address with the desired address for assigning the role.
-
Substitute the # for the role you desire to give the address. 0 = No Role, 1 = Manager, 2 = Admin
If you experience any errors make sure your tuple is formatted correctly.
Confirm the transaction:
- Once you've filled in the required input parameters and attached any necessary ETH, click the "Write" button next to the function. This will prompt a confirmation window from your Web3 wallet.
- Keep in mind that you'll have to pay gas fees for the transaction, so make sure you have enough ETH in your wallet to cover these costs.
- After confirming the transaction, you can view its details on Etherscan by clicking on the transaction hash.
Remember that writing functions to a smart contract often involves modifying its state, which may have irreversible consequences. Ensure you understand the function you're interacting with and the potential implications of the transaction before you proceed. Feel free to test this on testnet first.